User Tools
Sidebar
Add this page to your book
Remove this page from your book
Table of Contents
Quick start
After receiving your first ActiveGuard device, you can start using ActiveView. This quick start section will walk you through some basic functionalities and give you some understanding of what the application looks like and how it works.
Connecting your ActiveGuard
Make sure your device is properly configured to connect to the ActiveView server through your mobile operator’s network. If in doubt, contact your administrator. Next, place a SIM card inside your ActiveGuard (refer to the ActiveGuard user manual for details) and turn it on. Now you are ready to start using ActiveView.
Verifying connection
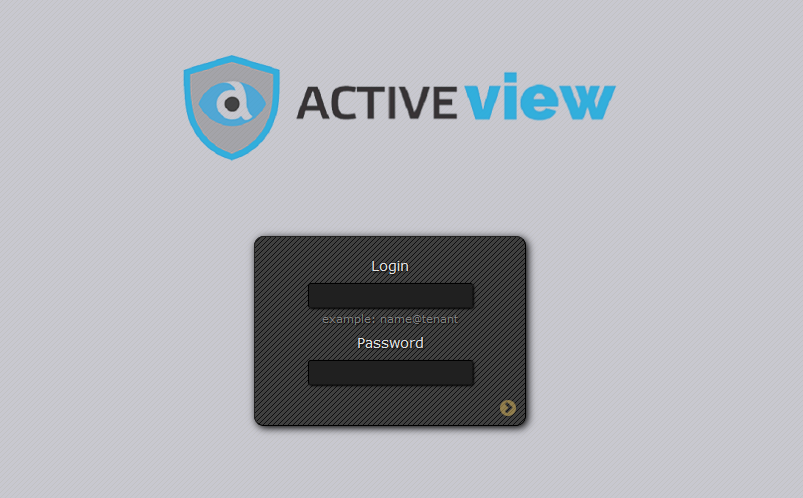
When you start ActiveView, you see a login screen. Use your user name and password to log in to the application.
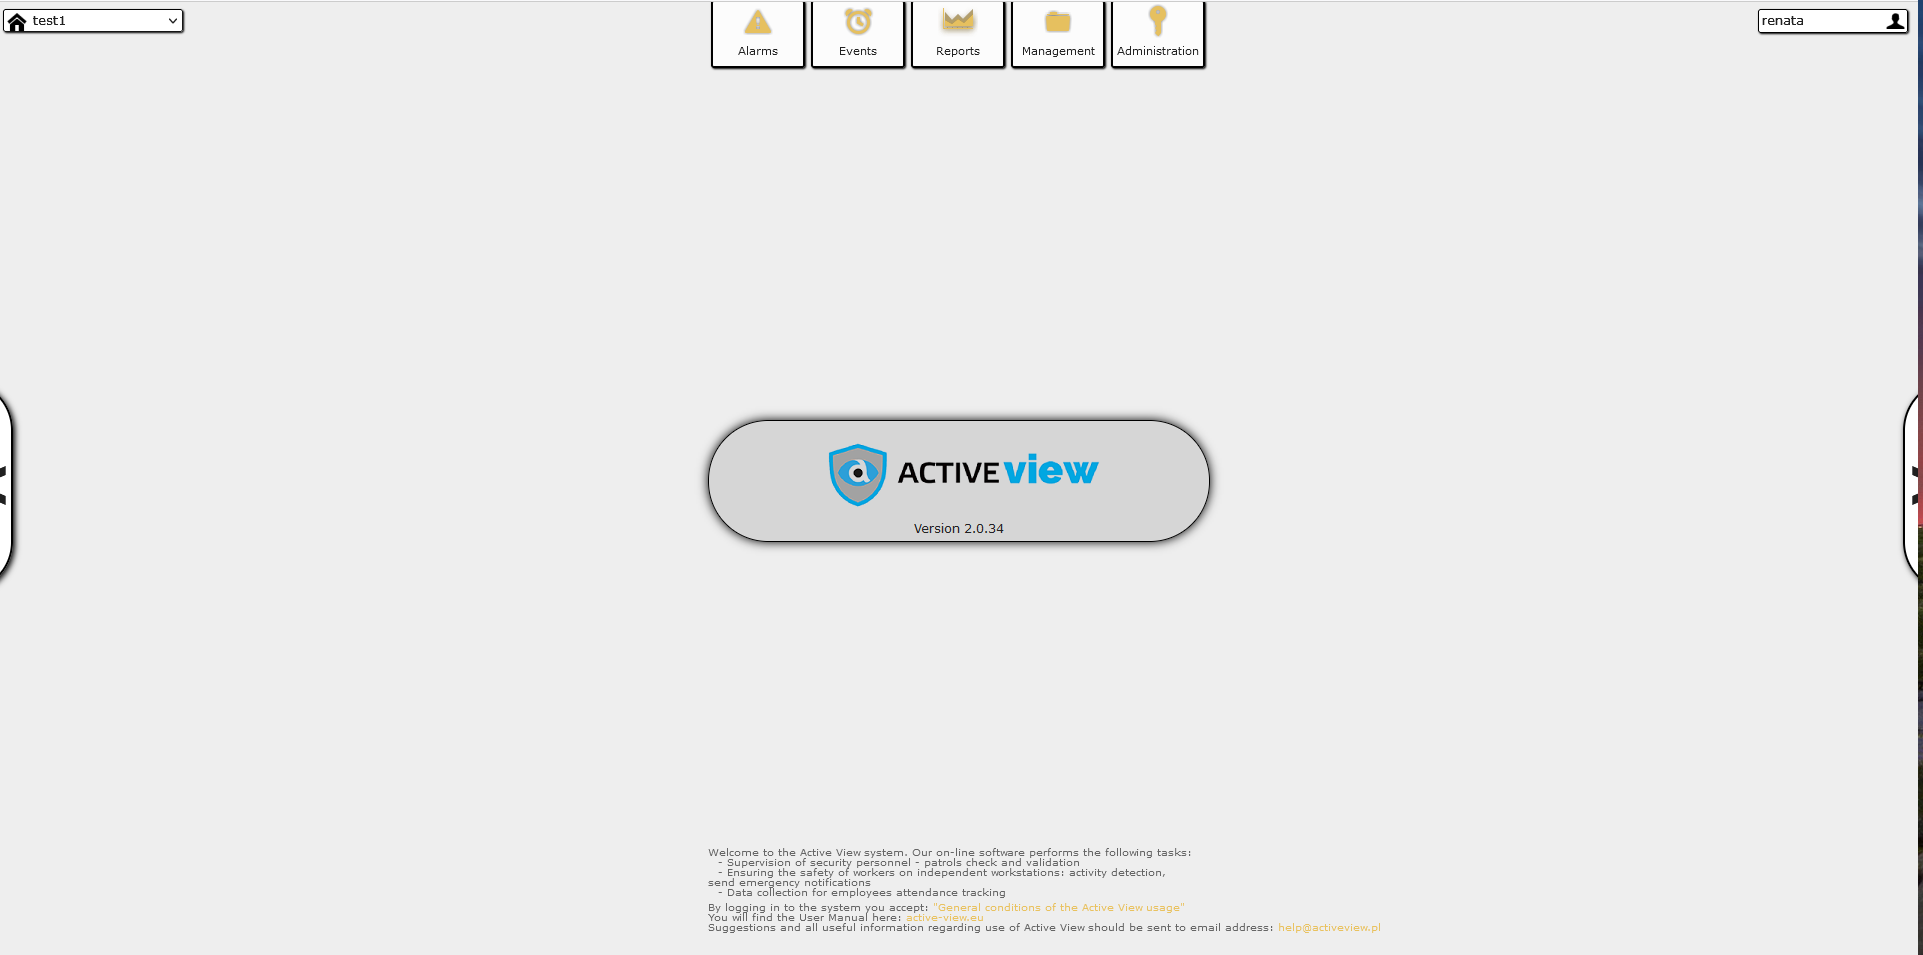
After successfully logging in, you are taken to the main screen. On the upper edge, there is the main menu. You can use it to get to main application functionalities, such as Alarms, Events, Reports, Management, Administration. In the upper right corner you can see your name. Click it to change user settings, change your password or log out.
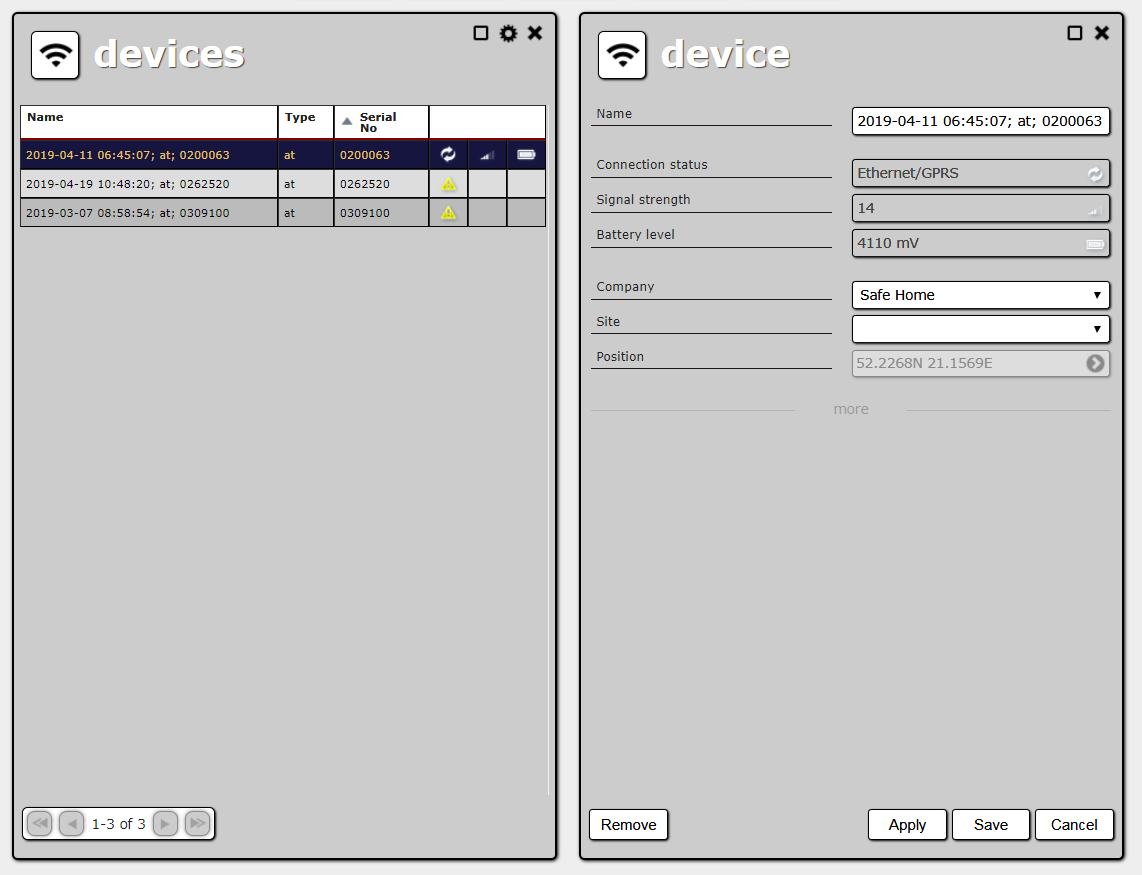
Your ActiveGuard should have connected to the server by now. To see a list of connected devices, choose the Management tab in the main menu and then select Devices. The Devices panel will open. Find your ActiveGuard and double-click it to open its detail view.
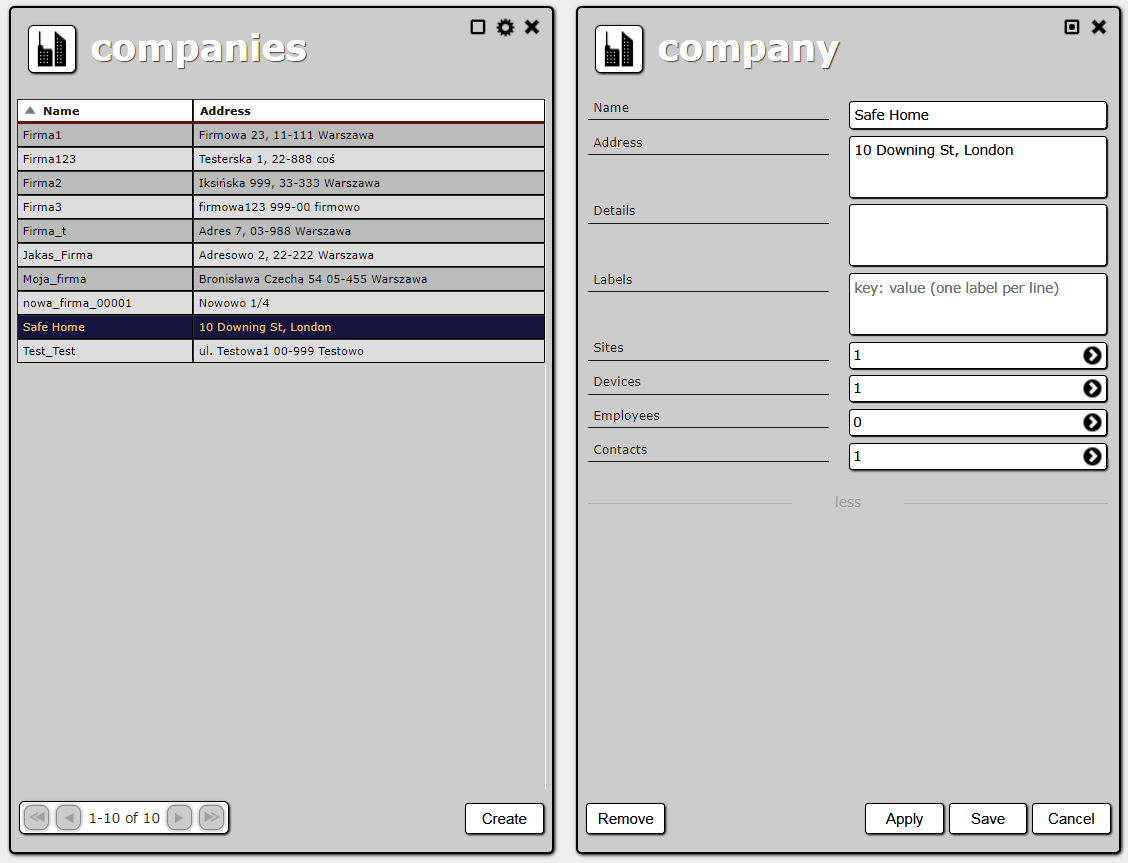
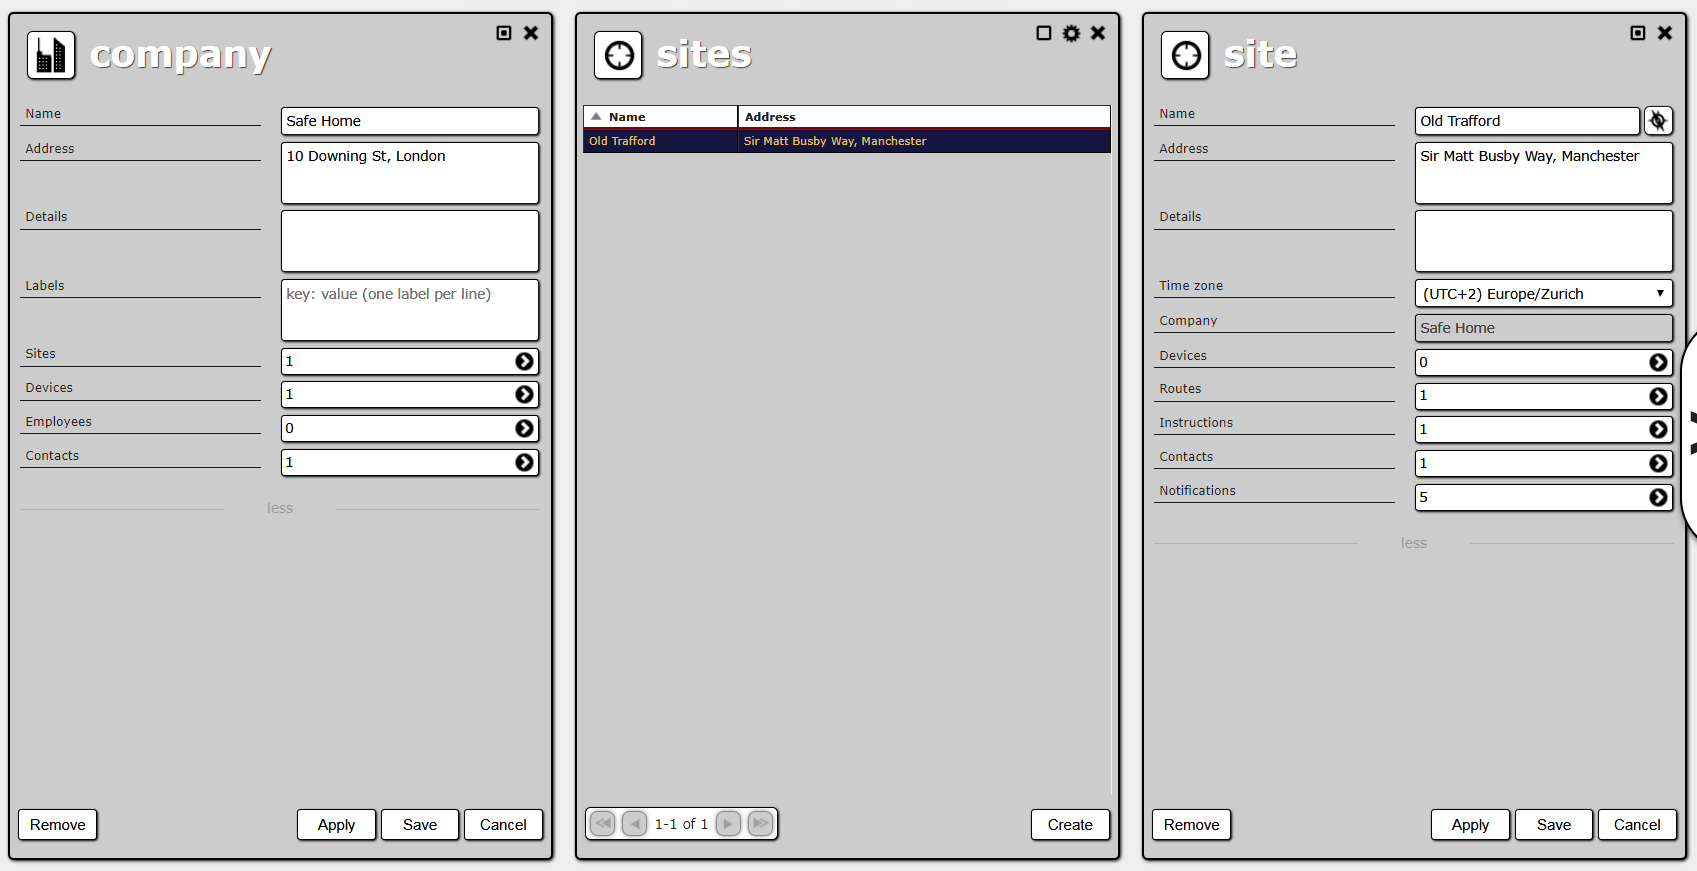
Now you see two panels: the first one is the device list and next to it, on the right, there are details of the selected device. This pattern is used across the whole application. Details of an object chosen in one panel are presented in a new panel on the right. This way, you can open two, three or more panels, with more and more details. If not all panels fit the screen, you can scroll them left and right, by moving your mouse while holding the Ctrl key and the left mouse key. Alternatively you can click on buttons on the left and right edges of the browser window (with < and > icons).
The device's details panel shows the connection status, signal strength and battery level of your ActiveGuard.
When your device is connected to the server, it sends different kinds of events. Some of them are just for technical purposes (e.g. TEST event). Other mean that an alarm occurred (e.g. PANIC event).
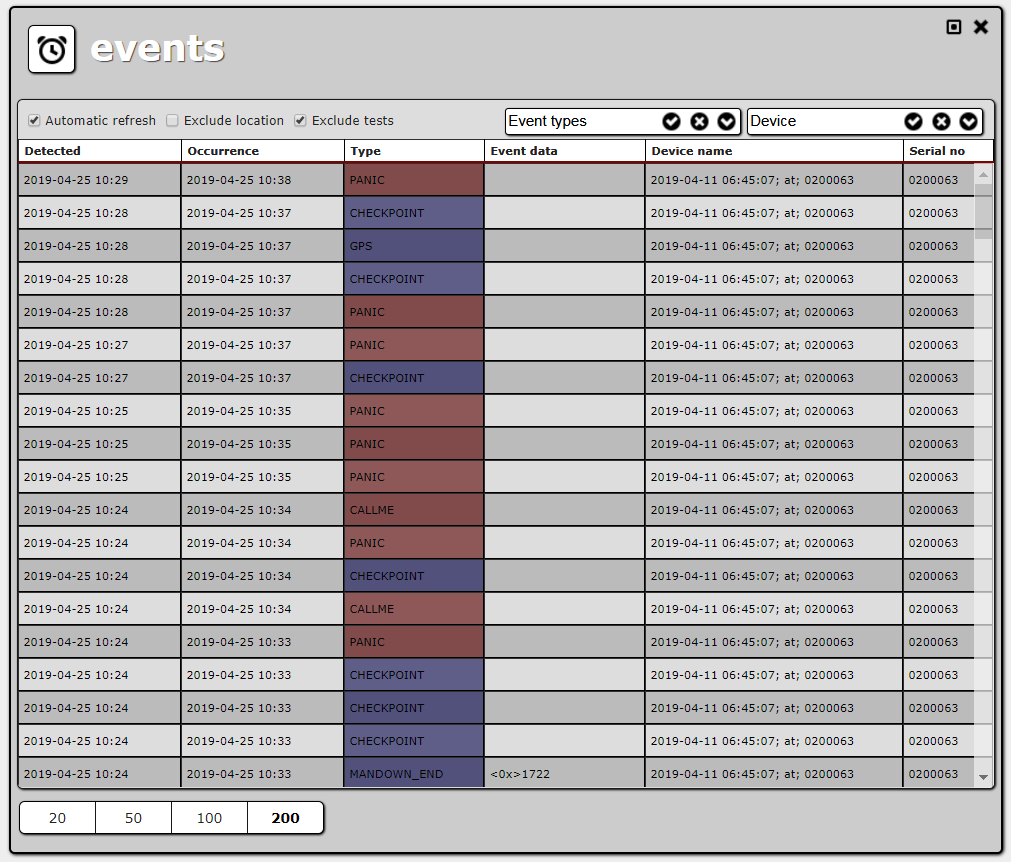
All events received by ActiveView are listed in the Events panel. Choose Events in the main menu to open it.
Now hit the Panic button on your ActiveGuard. You should see a PANIC event on top of the events list.
Use appropriate filters to display the events in detail: Skip LOCATION, Skip TEST, due to the type of event or device.
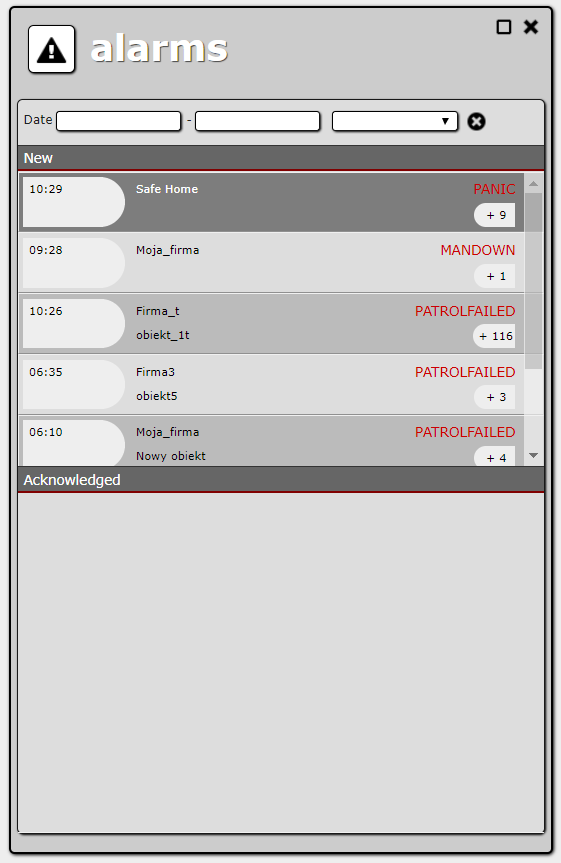
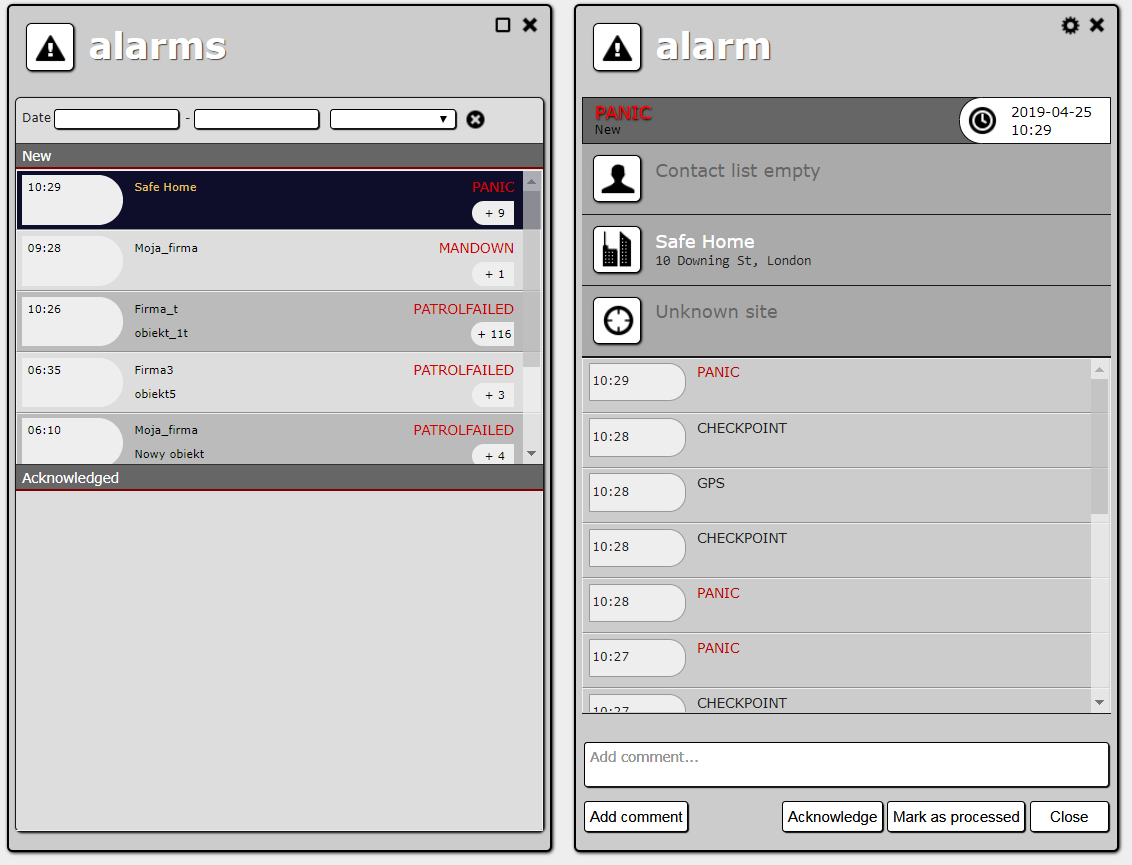
When ActiveView receives a PANIC event, it generates an alarm. The Alarms tab in the main menu should start blinking. Choosing it opens the Alarms panel.
Find PANIC alarm in the New section and double-click it. You now see the alarm’s details, including its type (PANIC), time of occurrence and list of other alarms and events which occurred on the same site.
Adding a patrolled site
One of the main functions of ActiveView is the verification of guard patrols. To use it, you have to define a patrol route.
Adding a company
Patrol routes are associated with sites. So first you need to set up data like the company, site and so on.
Go to Management → Companies where you will be able to create a company representing your client. Choose Create and set the company name. You can also fill in its address and additional information (details). Now choose Save.
This is an example of creating an object in ActiveView. You open a list and choose Create in the bottom right corner. Then, in a new panel, you fill in the details (some of them are mandatory, some optional) and choose Save. This creates a new object and closes the details panel. You could also choose Cancel, which would close the panel without creating a new object. And you could choose Apply, which would create new object, but leave the details panel open.
When you open details of an existing object (try it with the company you have just created), you get the Apply, Save and Cancel options too. You also get a Remove option, which lets you remove the object. All these options are always available in the same place, at the bottom of every details panel.
Adding a site
You have created a company, now you can create your client’s site. On the company details panel, click Sites and then Create to create a new site. Fill in the name and address (optional) and save changes.
The next step is to link your device to the client’s site. Open your ActiveGuard’s details (Management → Devices) and choose the company and the site which you have created earlier.
You now have a company, a site and a device linked to them. The only thing left to define a route are checkpoints (RFID tags).
Adding checkpoints
When you read a checkpoint with an ActiveGuard linked to a site, ActiveView automatically records it and connects it with the site. Try reading some checkpoints and then select Management → Tags in the main menu. Your new checkpoints should be on the list, connected with your client’s site. You can open their details and change their names for convenience.
Verification of a patrol
To verify a guard patrol, you have to define a patrol route.
Defining a route
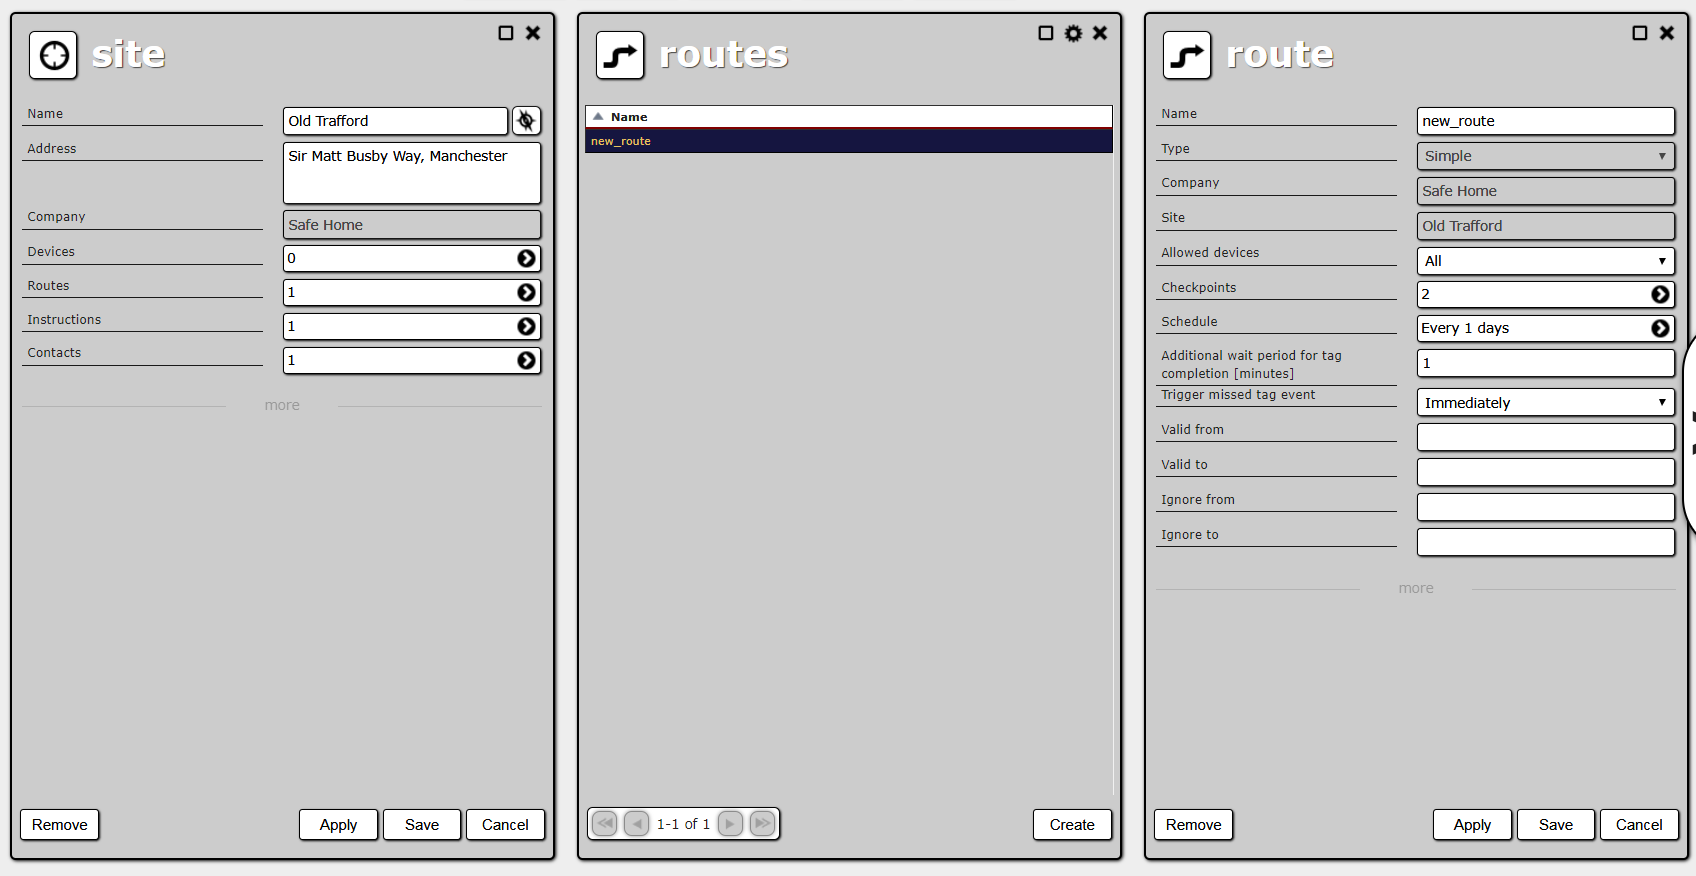
Open the details of your client’s site. You can do it either by finding the right company (Management → Companies in the main menu), listing its sites and choosing the one you are looking for or by listing all sites (Management → Sites) and choosing it there. On the site details panel, click Routes, and then Create.
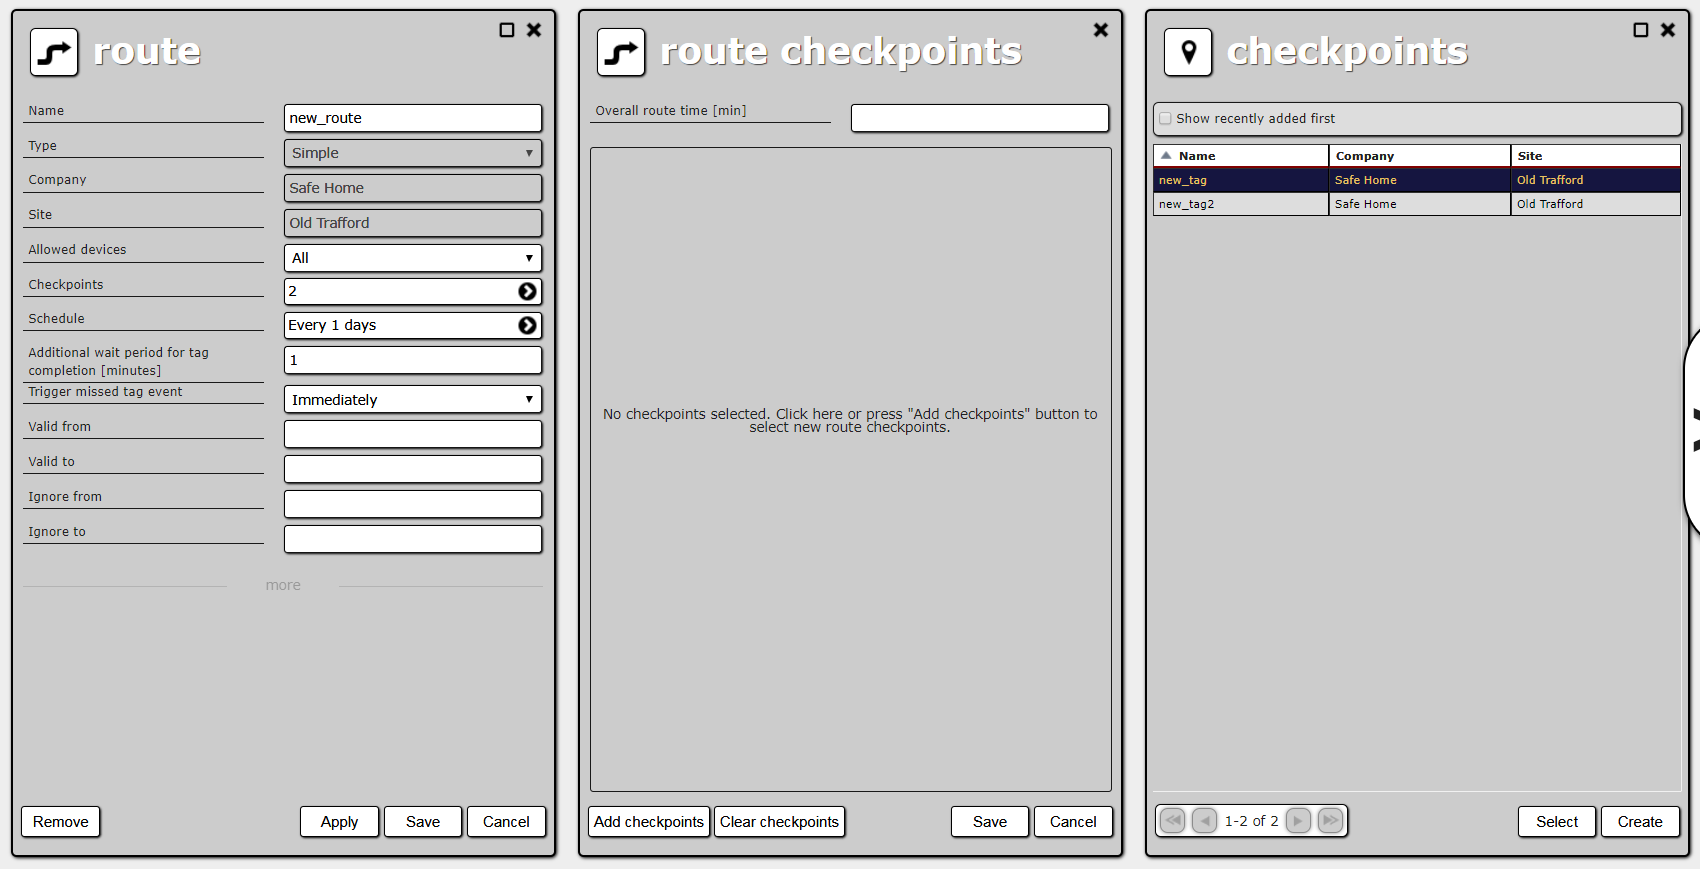
Enter a name for the route. Then click Checkpoints to open the route’s checkpoints list. The default route type is a simple route (that’s the one you are going to create). It means that a guard has a defined amount of time to pass all the checkpoints on the route without any particular order. First, enter the overall route time (route duration). Then click Add checkpoints, which opens a list of all checkpoints connected to the site. You can choose more than one row by “ctrl clicking” it. After you have made the selection, choose Select.
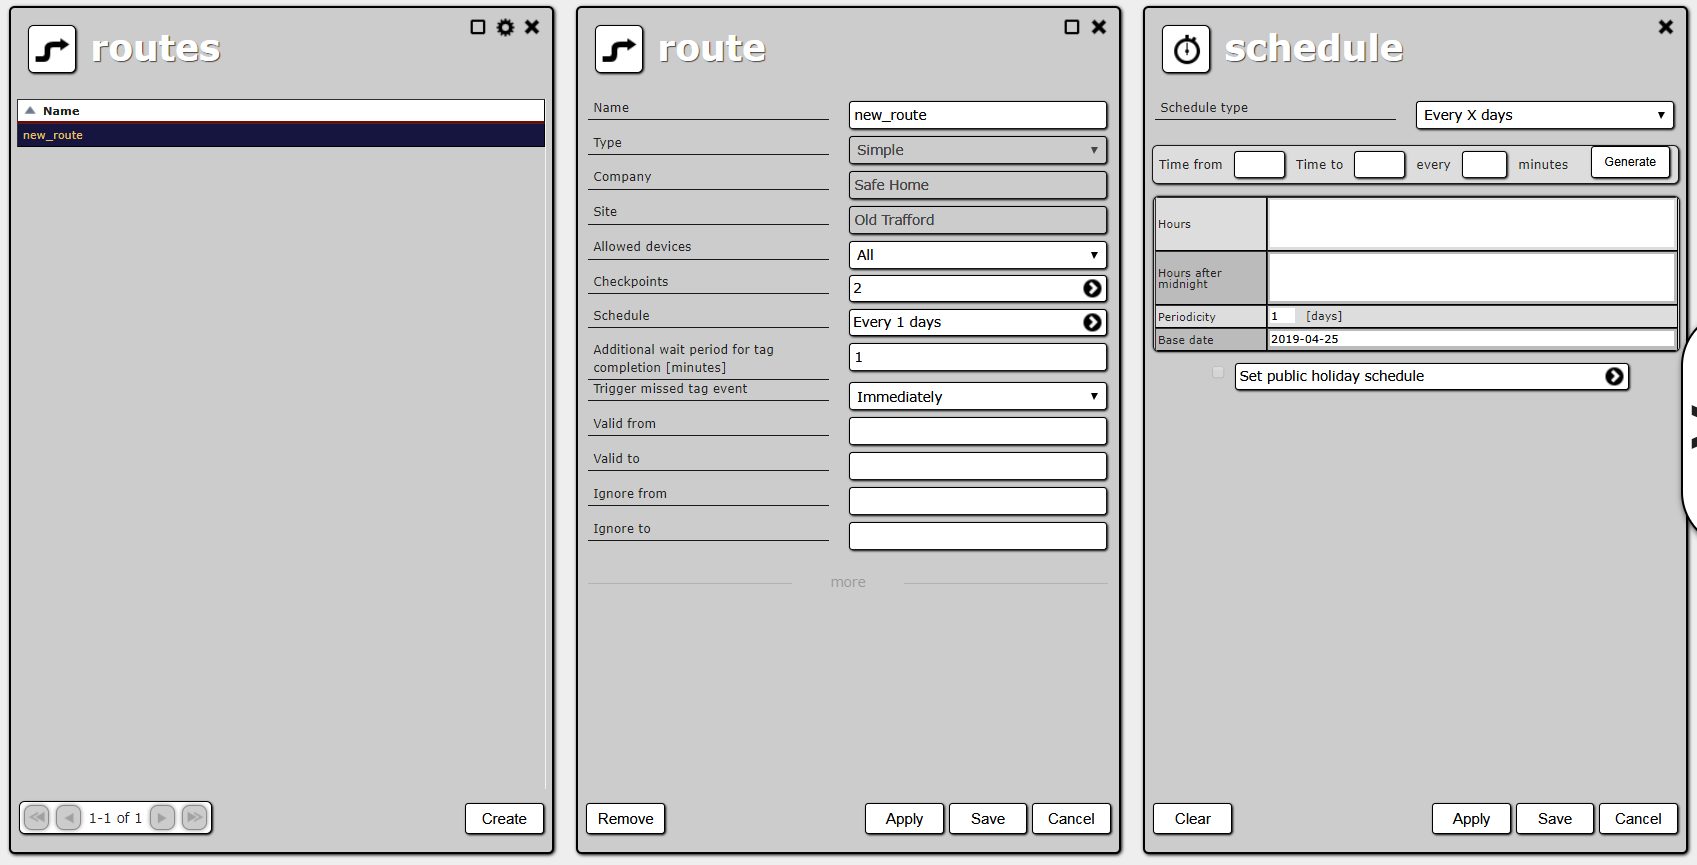
Now choose Save on the route checkpoints panel. You have defined what a single patrol looks like. The next step is to tell ActiveView when guards should perform patrols, i.e. define a schedule. To do this, click Schedule on the route details panel.
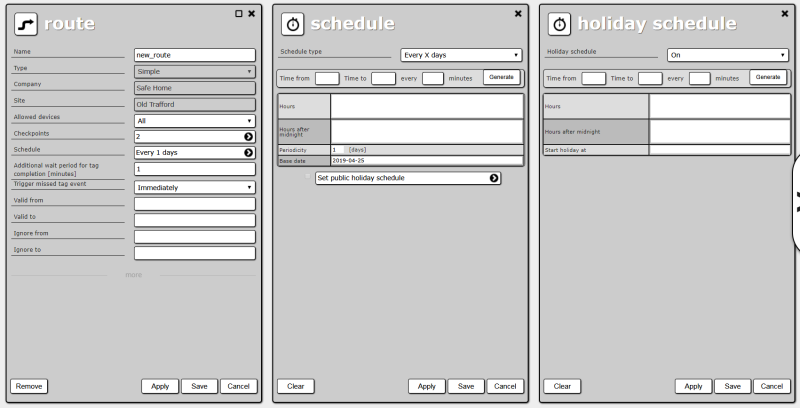
The default schedule type is “every X days”. It means that, depending on the periodicity, guards patrol a site every day, every second day and so on. On days when they do, patrols start at times you define (e.g. at 9 am, at 1 pm and at 5 pm). For your first route, you can leave the default periodicity and the base date of the schedule. You only need to fill in the hours list (it understands a 24-hour clock, times separated by semicolons, for example: 11:30; 13:30; 15:30). Next choose Save on the schedule panel. You have named your route, chosen checkpoints and schedule, and then select Save on the schedule panel.
Additionally, there is a form for holidays (both for weekdays and every X days). The user can define the start time of the holiday in the path (the holiday lasts 24 hours). The holiday form opens together with the main form, if holidays are active in this path, activation / deactivation of holidays is performed on the main form.
Looking for alarms
Open the Alarms panel (Alarms in the main menu). Wait until a patrol starts (it depends on the schedule you have defined). After the route’s duration, if the guard has not passed all checkpoints on the route, an alarm pops up.
These were the basics of ActiveView. Read the rest of the documentation to learn about all functionalities, including alarm handling, e-mail and text message notifications, reports, administration and more.

